
On this page 3 sections
2017 Principals’ Test Online Review
Taking the 2017 Principals’ Test? Let’s put your name in the list of passers! Allow us to help you through TeacherPH.
Spend your vacant time reviewing with us anytime, anywhere! Our site and android application is accessible anytime you need it. We’ll provide answers to your questions and give solutions to your problems regarding the examination.
CLICK HERE
Due to system maintenance, the online application for the 2017 Principals’ Test is extended until NOVEMBER 17, 2017.
User Guide: Account Registration
Applicant
This brief guide is provided to help the 2017 Principals’ Test applicants understand the steps in the online application process.
Read: 2017 Principals’ Test
Applicant – Account Creation
Applicants must have their own personal account. This account enables to submit the application and view its status.
To Create Account:
1. Access principalstestapplication.deped.gov.ph in your web browser.
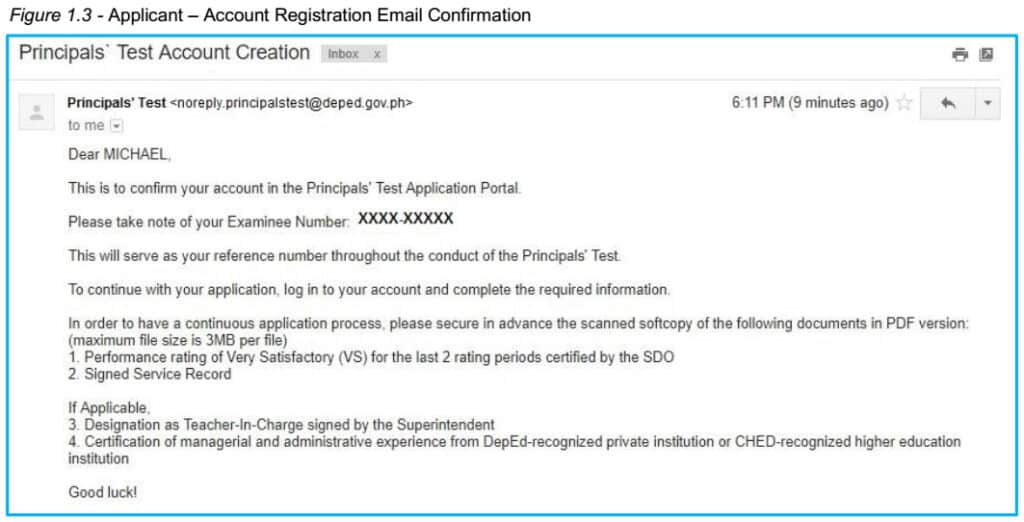
2. In the log in page (see Figure 1.1), click “Create Account”. You will be directed to Account Registration Form. (see Figure 1.2)
Note: Applicants must enter or select their personal details. (All fields with red asterisk (*) are required.)
3. Fill up Personal Information
- Enter First Name, Middle Name (If Applicable) and Last Name.
- Enter Name Extension (If Applicable).
- Select year, month and day in the dropdown list for Date of Birth
- Select Sex in the dropdown list.
- Enter Mobile Number (i.e. 09XXXXXXXXX).
- Enter Landline Number (If available, include area code)
- Enter Home Address (House No./Block/Lot No./Street/Subdivision/Village/Barangay).
- Select Region from the dropdown list (Home Address).
- Select Province from the dropdown list (Home Address).
- Select City/Municipality from the dropdown list (Home Address).
Log In Information
4. Enter your E-mail Address.
Note: E-mail address must be active .E-mail Addresses are not case sensitive.
5. Enter desired Password. (Passwords must be at least 8 characters long.)
6. Retype desired Password to confirm.
7. Click “Register” button to submit registration information.
8. A pop up message will appear together with your Examinee Number. Click “OK” to continue.
9. An email will be sent to your email address confirming the account creation. (see Figure 1.3)
Figure 1.1 – Applicant – Log In Page
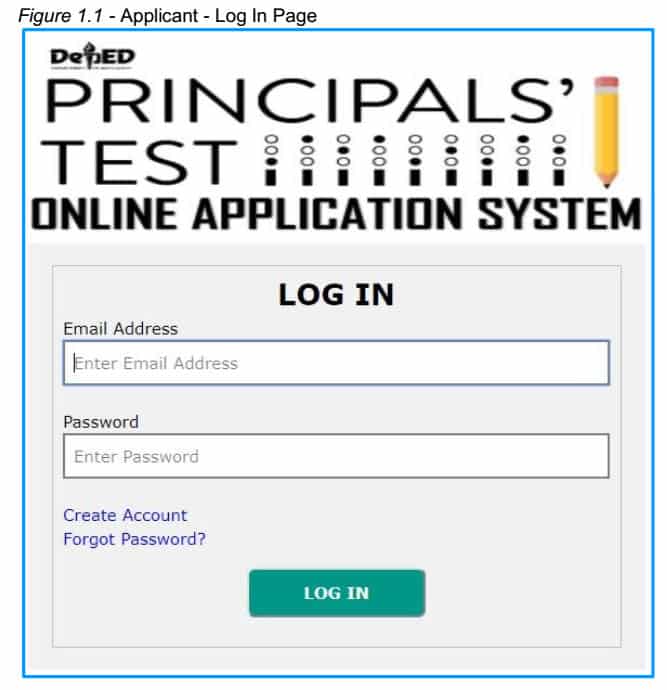
Figure 1.2 – Applicant – Account Registration
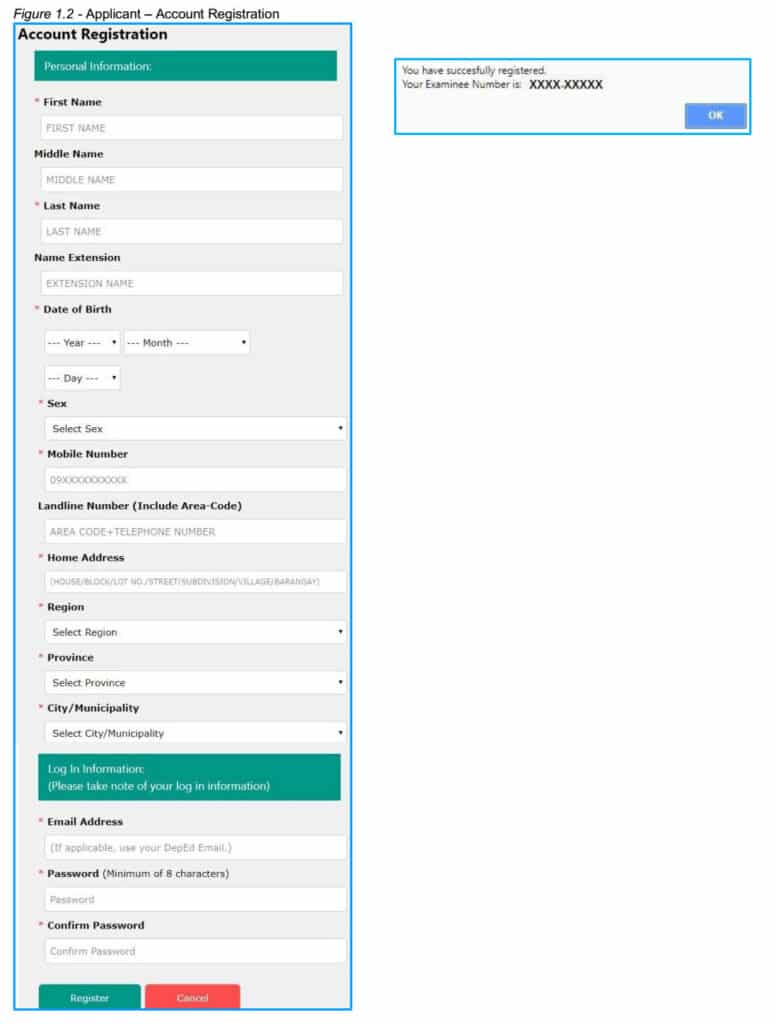
Figure 1.3 – Applicant – Account Registration Email Confirmation
Applicant – Logging In
To log in:
1. In the log in page (see Figure 1.1), enter Email Address (The email address you entered during the account creation.)
2. Enter your Password.
3. Click “Log In” button. You will be directed to the Application Form (see Figure 1.4).
Figure 1.1 – Applicant – Log In Page
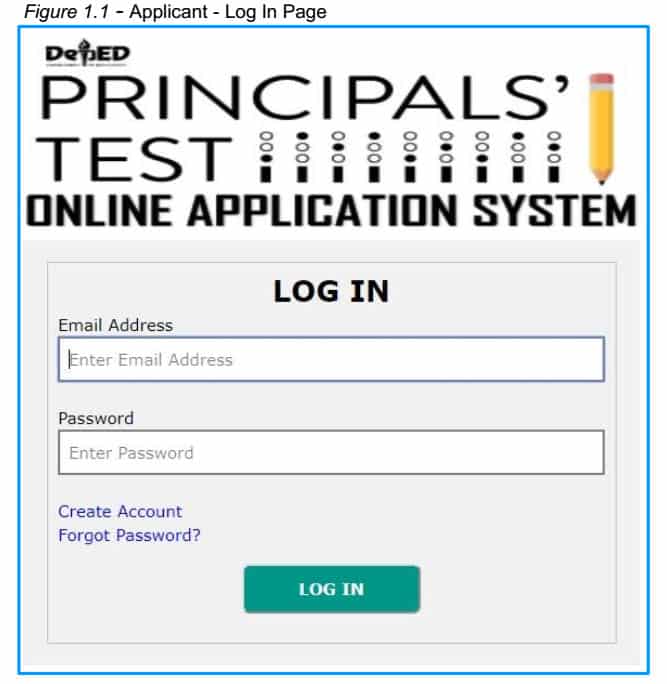
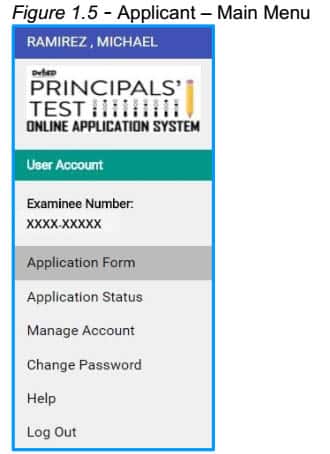
Figure 1.5 – Applicant – Main Menu
Applicant – Application Status
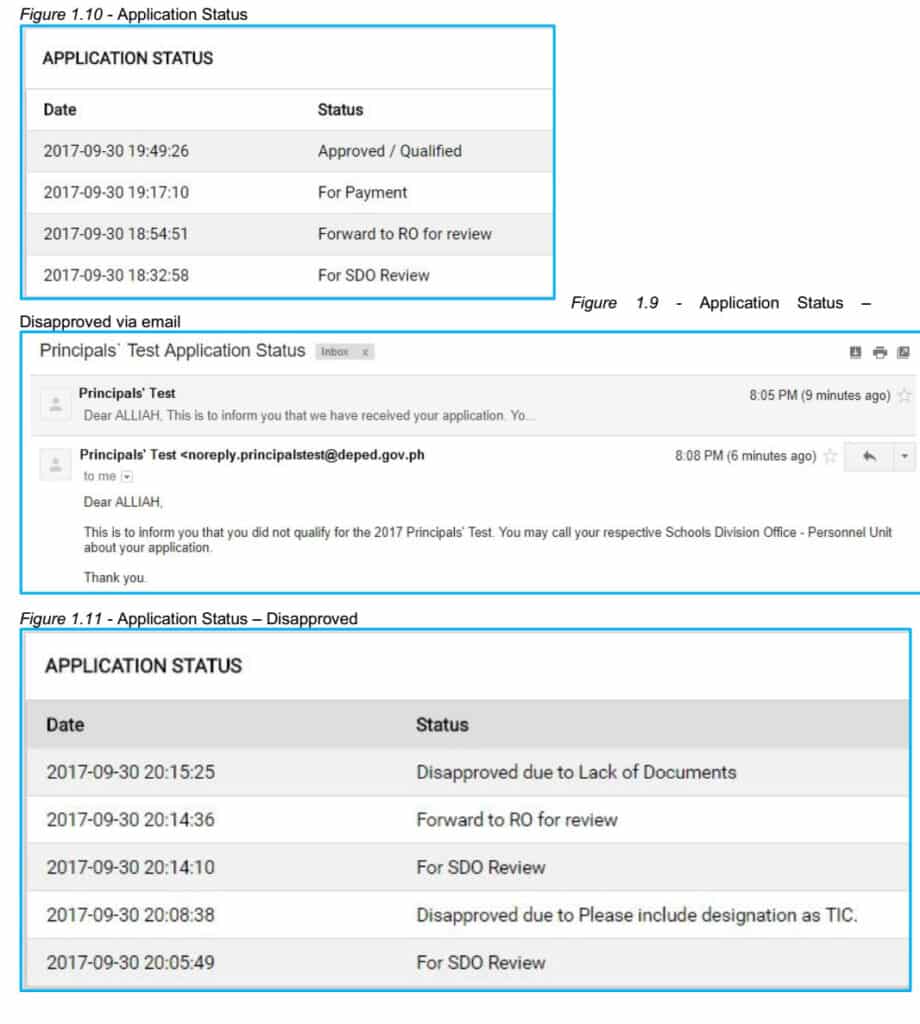
After submitting the application form, a summary page will appear showing the application status. Note: In every change in application status an update will be sent to your email.
> For SDO Review (see Figure 1.5 and 1.10)
– Applicants will receive confirmation email that his/her application was submitted to Schools Division Office.
– Division Office (DO) personnel will evaluate the application and attached documents. Then forward to Regional Office personnel for Review.
> For RO Review(see Figure 1.6 and 1.10)
– Applicants will receive confirmation email that his/her application was forwarded to Regional Office.
– Regional Office personnel will review application then approve application for payment.
> For Payment(see Figure 1.7 and 1.10)
– Applicants will receive confirmation email that his/her application has been approved for payment and SDO will issue the Certificate of Eligibility (COE. Applicant may now proceed to DO cashier for payment.
> Approved / Qualified(see Figure 1.8 and 1.10)
– Applicants will receive confirmation email that his/her application has been Approved / Qualified.
> Disapproved (see Figure 1.9 and 1.11)
– Applicants will receive email that his/her application has been Disapproved.
Note: When disapproved, applicant may re-apply.
Figure 1.5 – Application Status – Confirming of receipt via email
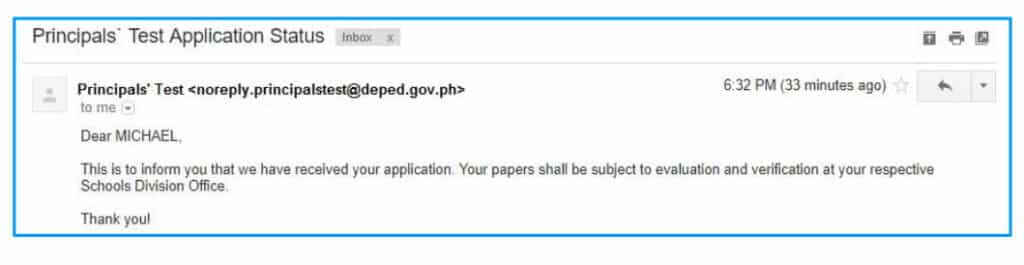
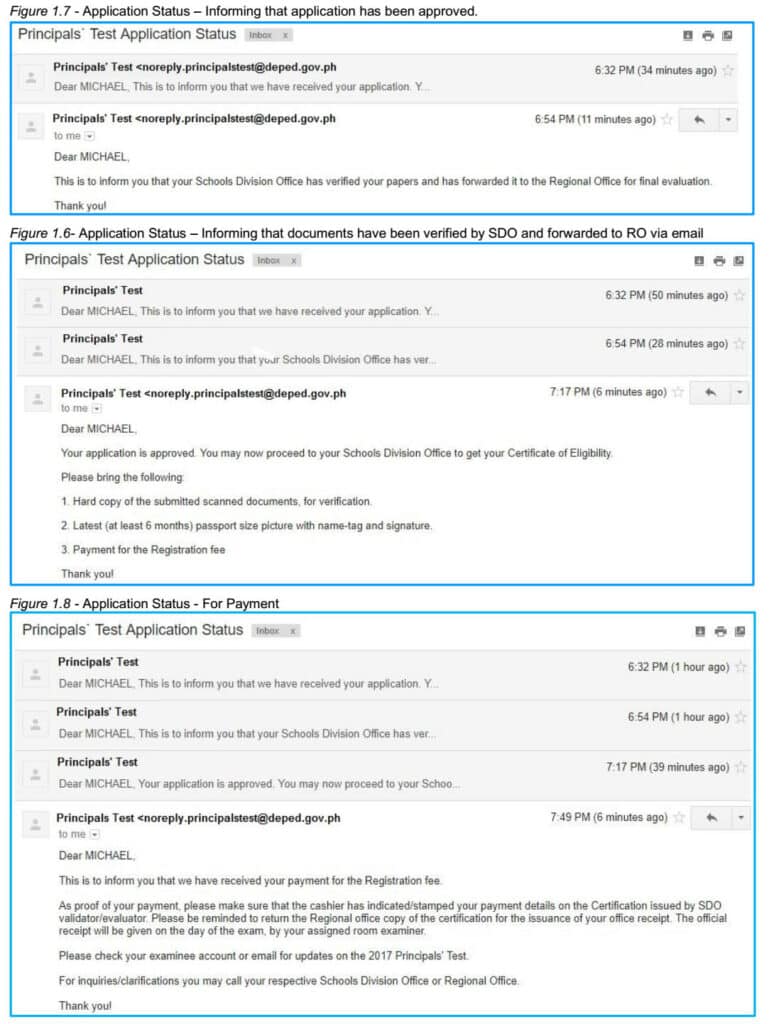
Figure 1.10 – Application Status
Figure 1.9 – Application Status – Disapproved via email
Figure 1.11 – Application Status – Disapproved
Applicant – Managing Account
Personal details can be updated.
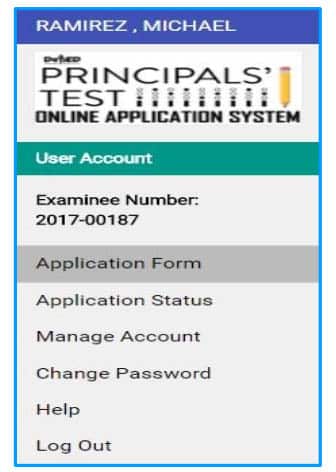
1. Click “Manage Account” (see Figure 1.5) from the main menu. You will be directed to Manage Account. (see Figure 1.12)
2. Click “Edit” button to update personal information.
- Edit First Name, Middle Name and Last Name.
- Edit Extension Name. (If Applicable)
- Select Sex in the dropdown list.
- Edit your Mobile Number or Landline Number.
- Edit Home Address.
- Select Region from the dropdown list.
- Select Province from the dropdown list.
- Select City/Municipality from the dropdown list.
3. Click “Update” button to save changes or click “Cancel” to discard changes.
4. A pop up message will appear after you successfully updated your personal details. Click “OK” to continue.
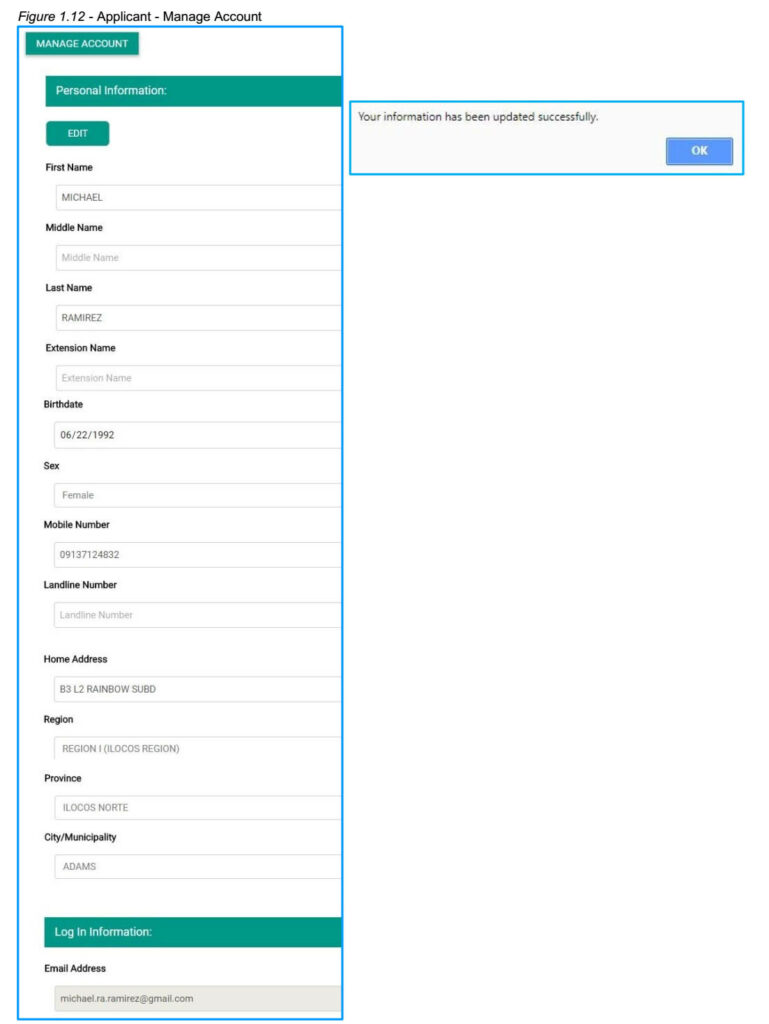
Figure 1.12 – Applicant – Manage Accoun
Applicant – Change Password
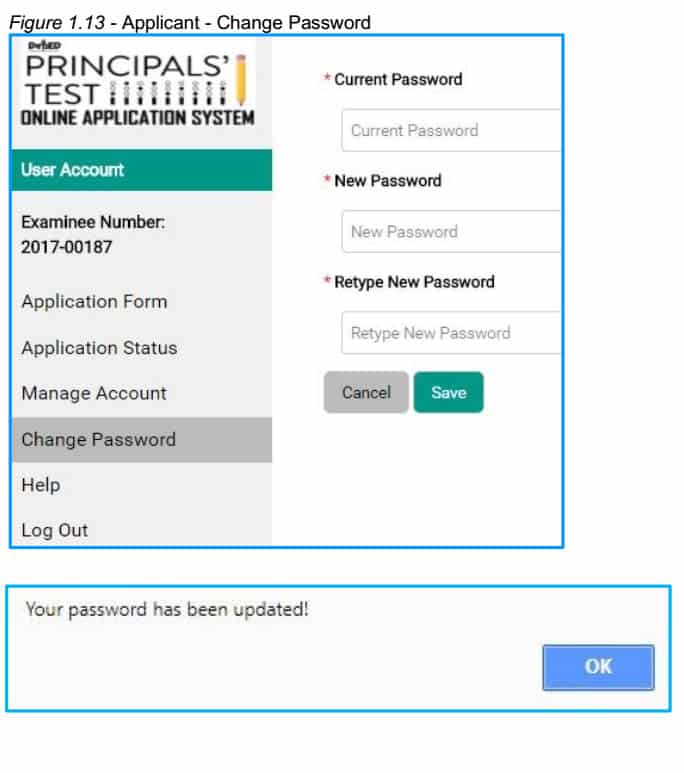
This allows user to change their password. Take note that the new password must not be the same as the current password.
1. Click “Change password” from the main menu.
2. Enter Current Password in the space provided.
3. Enter the desired New Password.
4. Retype Password to confirm.
5. Click “Save” Button.
6. A pop-up message will appear after you have successfully updated your password. Click “OK” to continue.
Figure 1.13 – Applicant – Change Password
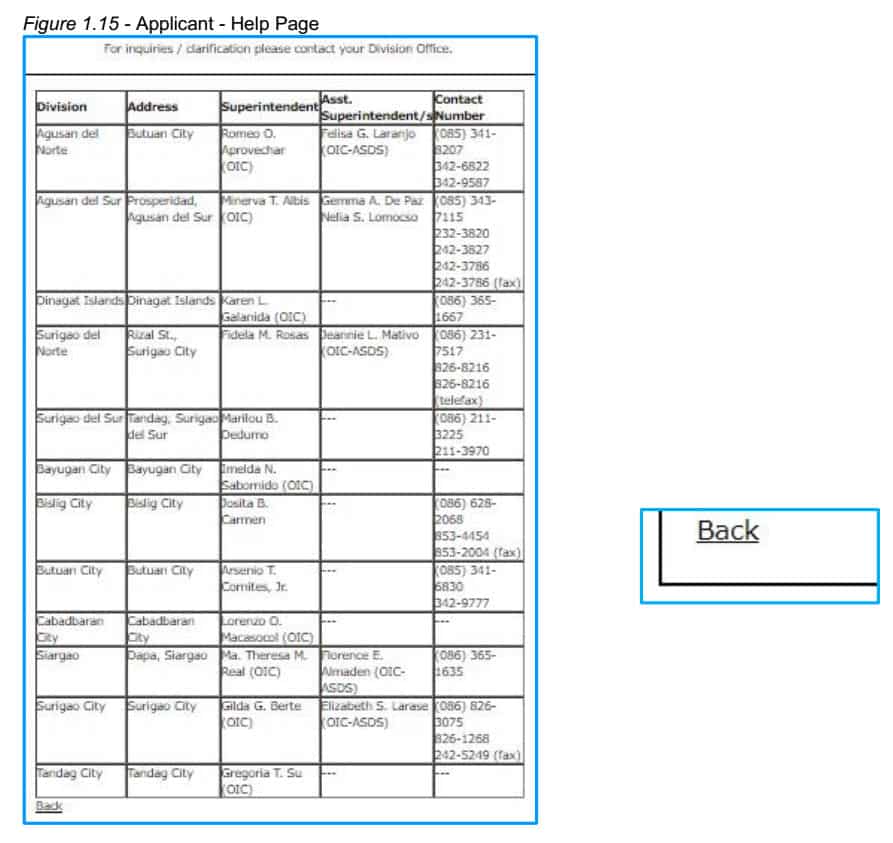
Applicant – Help
1. Click “Help” button to open the directory of division offices.
2. Click “Back” button. You will be redirected to your account.
Figure 1.14 – Applicant – Help
Applicant – Password Recovery
1. In the log in page (Figure 1.1). Click “Forgot Password” to reset password.
2. Enter Email Address.
3. Select Year, Month and Day of your Date of Birth in the drop down list.
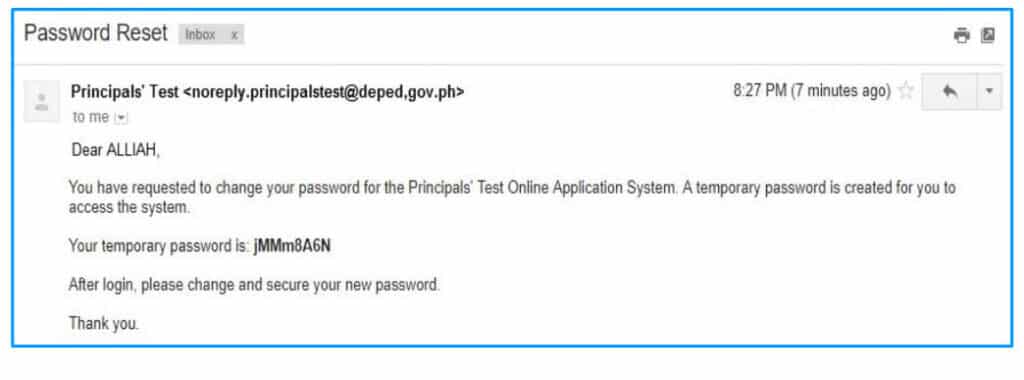
4. Click “Reset” button. After clicking the reset button you will be redirected to the log in page. A temporary password will be sent to your email.
Figure 1.1 – Applicant -Log In Page
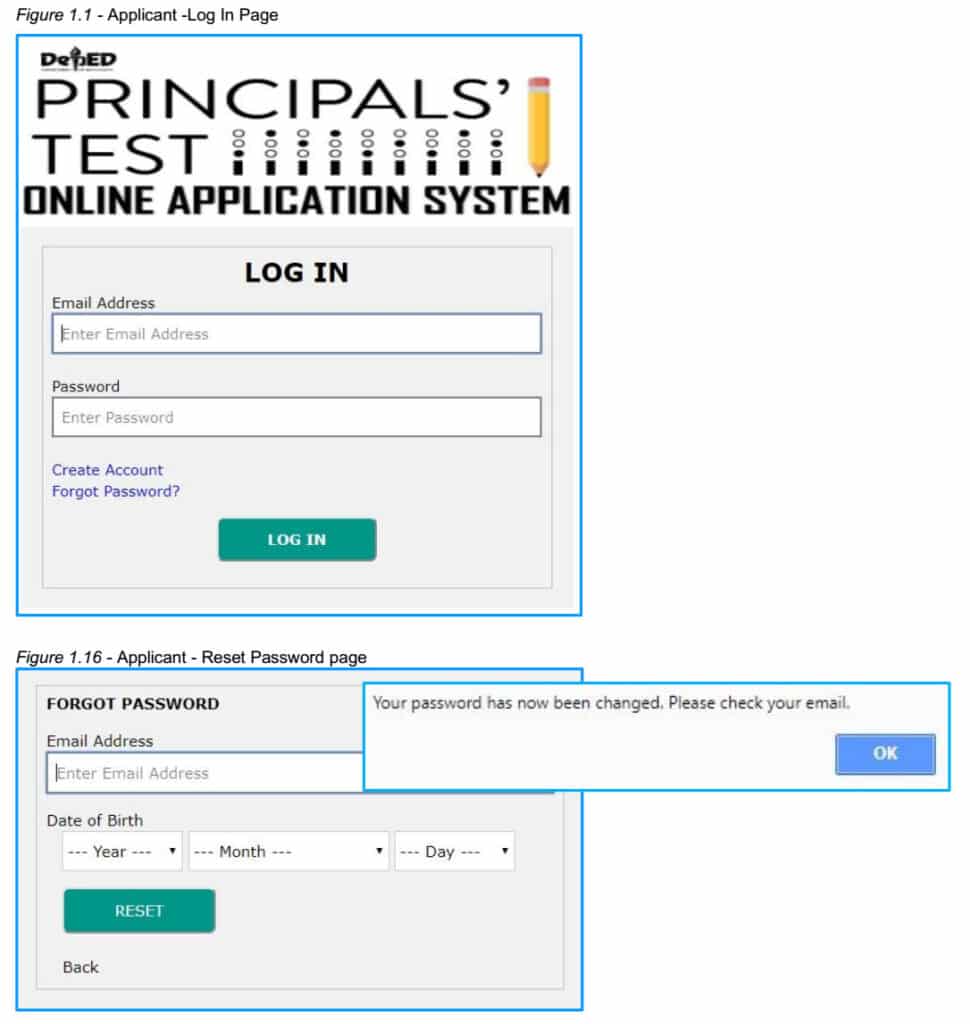
Figure 1.17 – Applicant – Password Reset Information via email
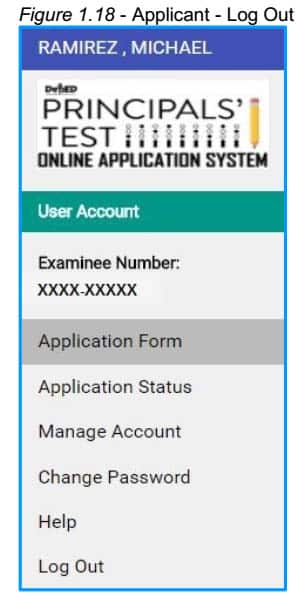
Applicant – Logging Out
1. Click “Log Out” button to logout. You will be redirected to the log in page.
Figure 1.18 – Applicant – Log Out
User Guide: Application Form
Applicant – Application Form
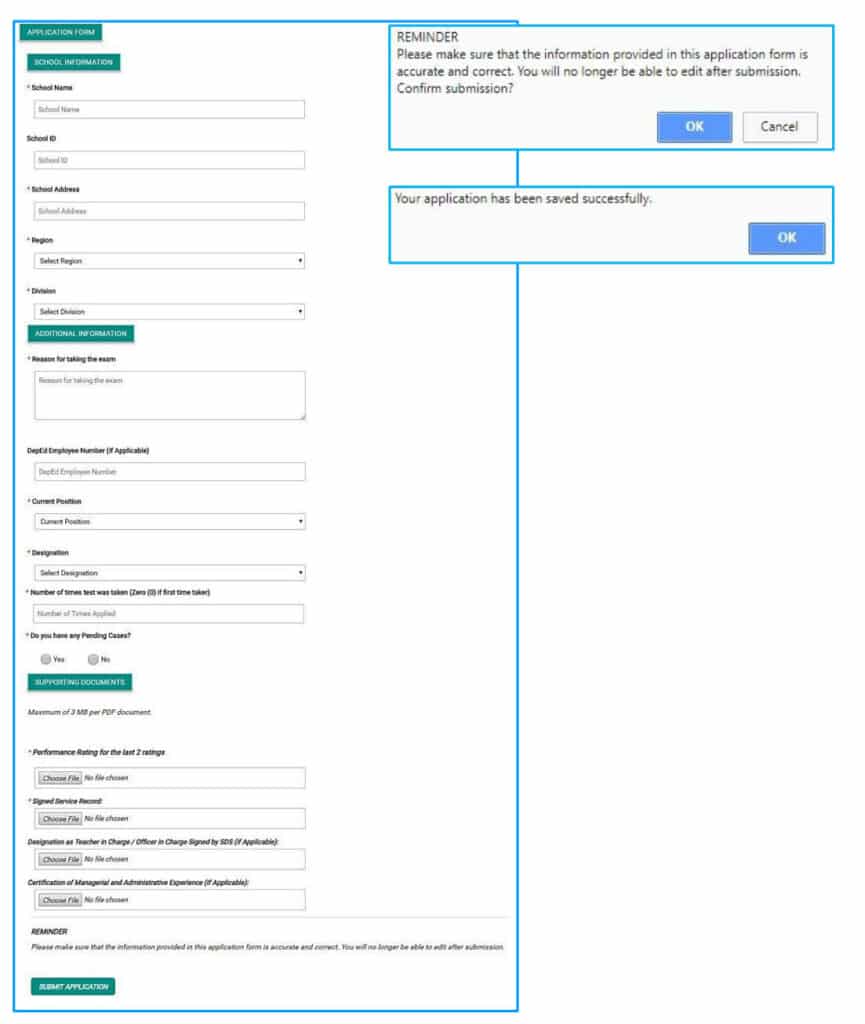
After logging into the system, applicant must fill out all required information in the application form
(see Figure 1.4).
1. School Information
- Enter complete School Name.( i.e Juan Dela Cruz National High School)
- Enter corresponding School ID(i.e123456)
- Enter complete School Address.
- Select Region from the dropdown list.
- Select Division from the dropdown list.
2. Additional Information
- Enter Reason for taking the exam.
- Enter your 7 digit DepEd Employee Number.(i.e1234567) (If Applicable)
- Select Current Position from the dropdown list. If “Others”, specify in the space provided.
- Select Designation from the dropdown list. If “Others”, specify in the space provided.
- Enter the Number of times test was taken. (1-10) (Enter “0” if first taker)
- Enter the year(s) in the space provided.
- Answer the question “Do you have any pending case?” If “Yes”, specify in the space provided.
3. Attachments
Applicants should attach soft copy of documents. The system only allows PDF file type.
Note: File size per document should not exceed 3 Mega Bytes (MB).
a. Performance Rating for the last 2 ratings;
b. Signed Service Record;
c. Designation as Teacher in Charge / Officer in Charge Signed by SDS; (If Applicable) and;
d. Certification of Managerial and Administrative Experience.(If Applicable)
4. Click “Submit Application” button to submit application. A prompt will show that says if you are sure with your application details you can click “OK” if not click cancel.
5. A prompt will show that your application has been saved. Click “OK”.
Figure 1.4 – Applicant – Application Form

Leave a Reply